
By Ian | The Worm Farmers
Looking for a science project that doesn’t end up forgotten in a closet by Thursday? Try building a little worm farm.
I know. Worms. Not exactly the first thing most parents picture when they hear “family activity.” But give a kid a handful of shredded cardboard, a few veggie scraps, and a bin full of red wigglers, and suddenly the banana peel has an audience.
The cool part is that the worms aren’t performing tricks. They’re helping break down food waste. Your kids get to watch it happen, ask questions, and learn why healthy soil is full of life.
I’m Ian from The Worm Farmers. I keep both homemade tote bins and ready-made worm systems, including a VermiHut. And my biggest advice for beginners hasn’t changed: start small, don’t overfeed, and don’t make this harder than it needs to be.
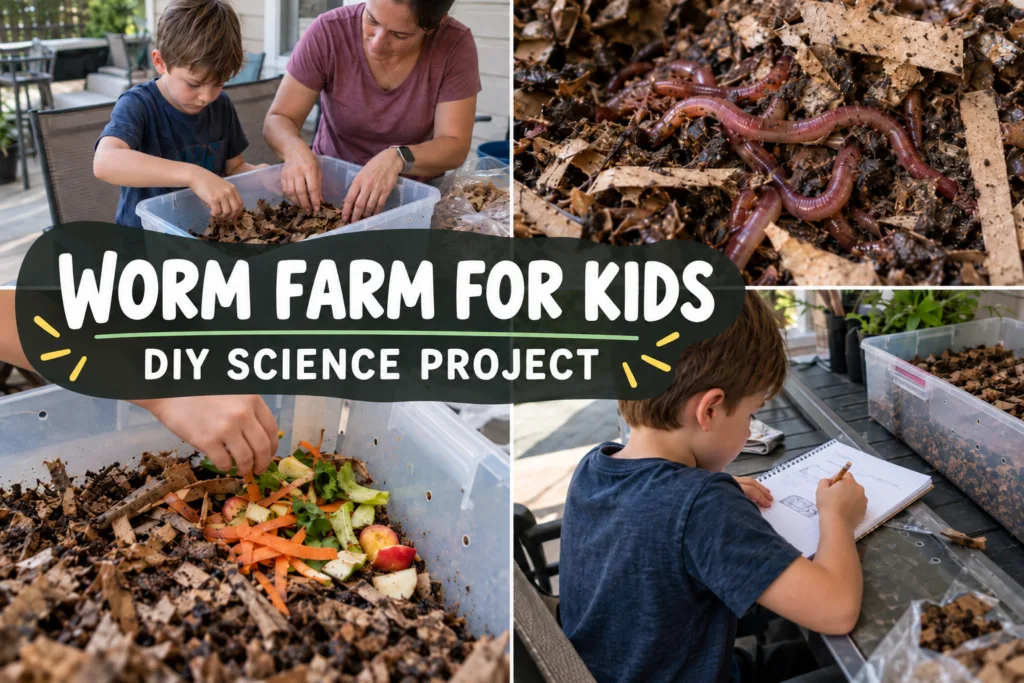
In this guide, we’ll build a simple DIY worm farm for kids, set up a seven-day observation experiment, and compare two ready-made bins in case you’d rather skip the drill. I’ve also made a free Junior Worm Farmer Observation Journal to go along with the project.
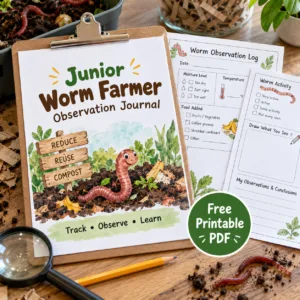
Free Junior Worm Farmer Adventure Journal
Print the free 8-page adventure journal before you start. It has seven little science missions, bigger drawing spaces, a Worm Detective Bingo game, a 30-day follow-up challenge, and a Junior Worm Farmer certificate. The picture here is a journal mockup; the PDF contains the complete printable pages.
Quick answer: To make a kid-friendly worm farm, prepare a ventilated opaque plastic tote with a lid, add loose damp shredded cardboard, introduce red wiggler composting worms, and offer a very small amount of fruit or vegetable scraps once the worms have settled. Keep the bin shaded, moist rather than soggy, and check it briefly instead of digging through it every day.
Plan ahead: Allow roughly 30–60 minutes for basic assembly, depending on the tote and tools. An adult handles drilling and sharp edges; kids can shred cardboard, help prepare bedding, and make observations. Prepare the habitat before ordering worms, and give new arrivals time to settle.
At a Glance: Your Family Worm Farm Project
Difficulty: Beginner-friendly with adult supervision.
Setup: About 30–60 minutes.
Experiment: Seven short observation missions; continue weekly if the kids are hooked.
You’ll need: A ventilated opaque tote, damp shredded cardboard, composting red wigglers, a tiny bit of produce, and the free journal.
Grown-up jobs: Drill ventilation holes, check safe temperatures, and supervise worm handling and handwashing.
Affiliate disclosure: Some links in this article are affiliate links. I may earn a commission if you purchase through them, at no extra cost to you. As an Amazon Associate I earn from qualifying purchases. I recommend starting with inexpensive materials and buying only what you need.
Why a Worm Farm Makes a Great Science Project for Kids
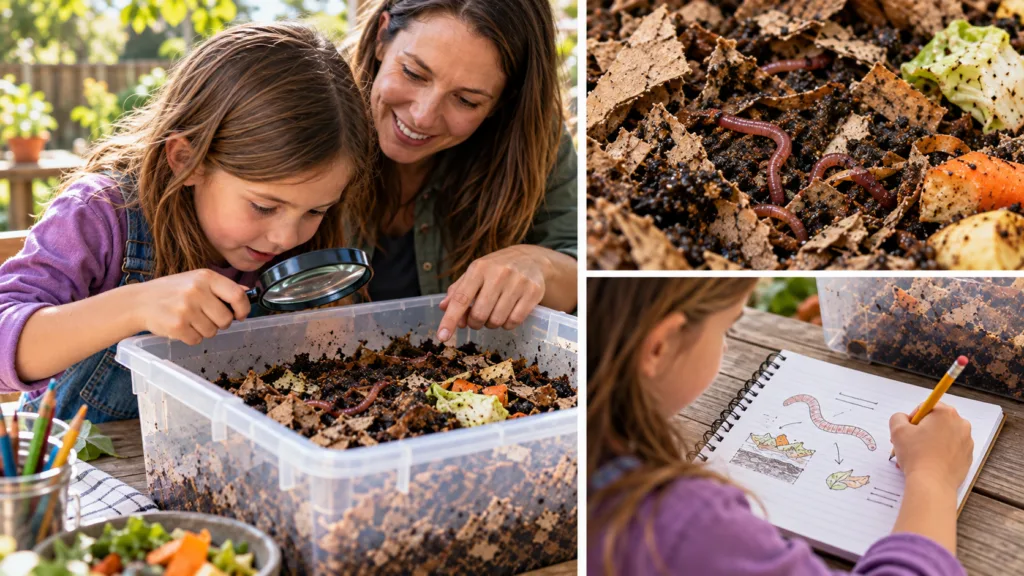
A worm bin is a tiny recycling center you can keep at home. Red wigglers and microorganisms help turn food scraps and bedding into vermicompost over time. It’s one thing to tell kids how food breaks down. It’s another to let them compare a piece of apple on day three with what it looks like a week or two later.
Kids can explore several real scientific questions:
- What happens to fruit and vegetable scraps as they decompose?
- Why do composting worms need damp bedding and air?
- Is the bedding temperature the same every day?
- Does chopped-up food change faster than a big chunk?
- Why is patience such an important part of worm farming?
The goal isn’t to get a perfect result in seven days. It’s to notice changes, write them down, and ask better questions. Sometimes food will still be visible at the end of the week. That’s a result, too.
Supplies for a DIY Worm Farm for Kids
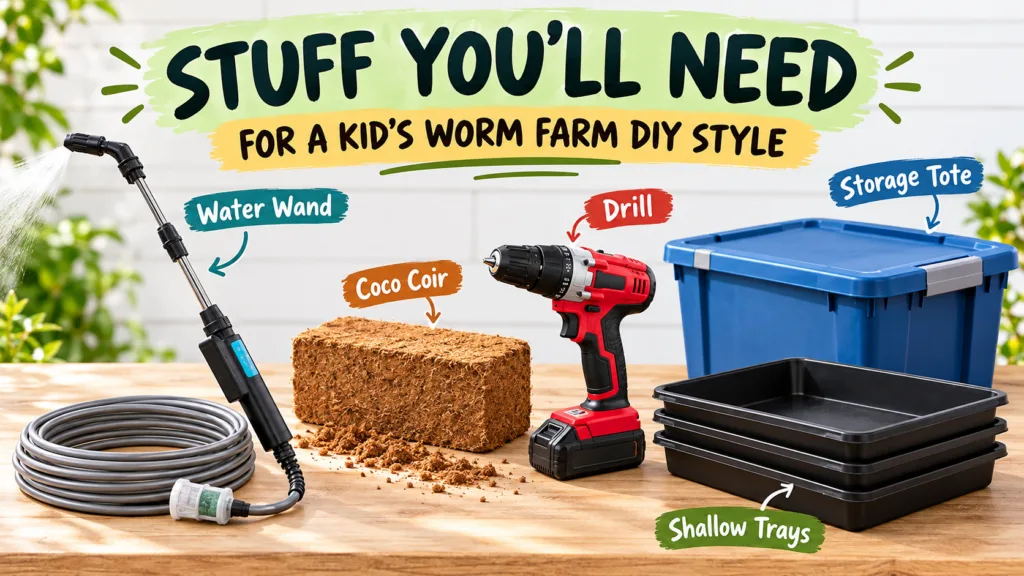
Here’s the beginner shopping list. Some of this is probably sitting around your house already.
- A dark plastic storage tote with a fitted lid. A shallow, roomy tote is easier to manage than a tall, narrow one. A roughly 10–18-gallon tote works for a family project when the worm population and feeding are kept modest; the surface area matters more than how deep it is.
- A drill and small bit — for adults only. The tote needs ventilation. You’ll also plan for safe drainage or carefully monitor moisture so water doesn’t pool.
- A catch tray. Place it underneath if your setup has drainage holes.
- Plain shredded corrugated cardboard or paper. Skip shiny coated paper, tape, staples, and heavily inked materials.
- I prefer an electric water wand. A regular watering can or spray bottle works, too. Dampen the bedding before the worms move in.
- Red wiggler composting worms. Use worms suited to composting bins, not random large earthworms dug from the yard.
- A few plain fruit or vegetable scraps. Start with a tiny feeding, not a mountain of leftovers.
- The Junior Worm Farmer journal. Print it and grab a pencil.
Optional extras: A compost thermometer makes temperature a fun number to track. Coconut coir can supplement cardboard, but you don’t need to buy fancy bedding to get started.
My trusted source for red wigglers
For the worms themselves, I recommend Meme’s Worms Pure Red Wigglers. Their half-pound option is described as approximately 500 worms, though counts are estimates and availability can change. Prepare the bin before you order live worms, then check shipping and live-arrival policies at checkout. In my experience, Samantha offers fantastic customer service. If you need help, her phone number is listed on the website.
How to Make a Worm Farm for Kids: Step by Step
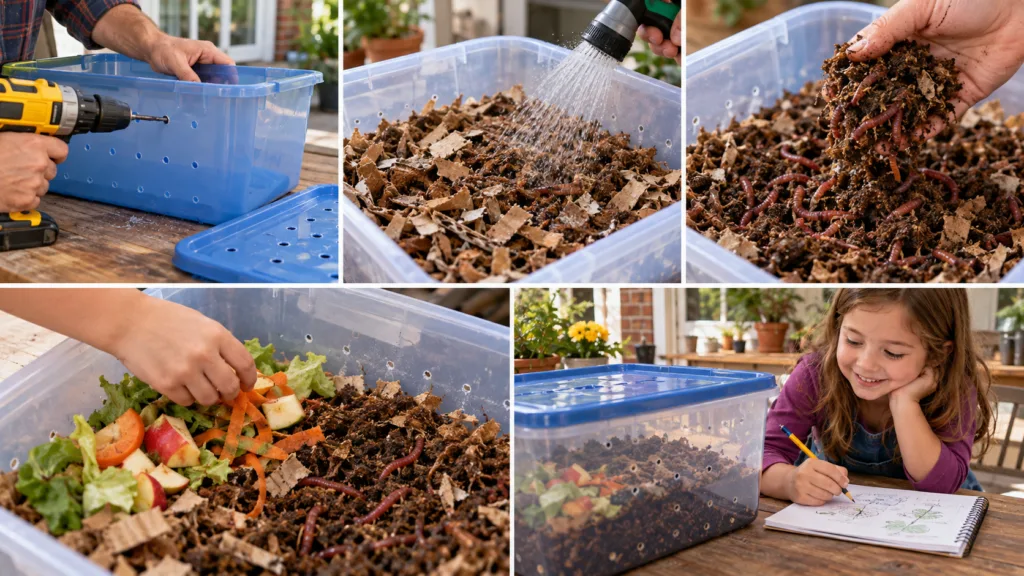
Step 1: Prep the tote before the worms arrive
For a first project, I like a simple Rubbermaid tote with a lid. It doesn’t have to be beautiful. The worms won’t be giving out interior-design awards.
Pick a container that fits on a protected shelf or shaded spot and still gives you room to lift bedding gently. Keep it out of direct sun. A bin can heat up fast, especially outdoors.
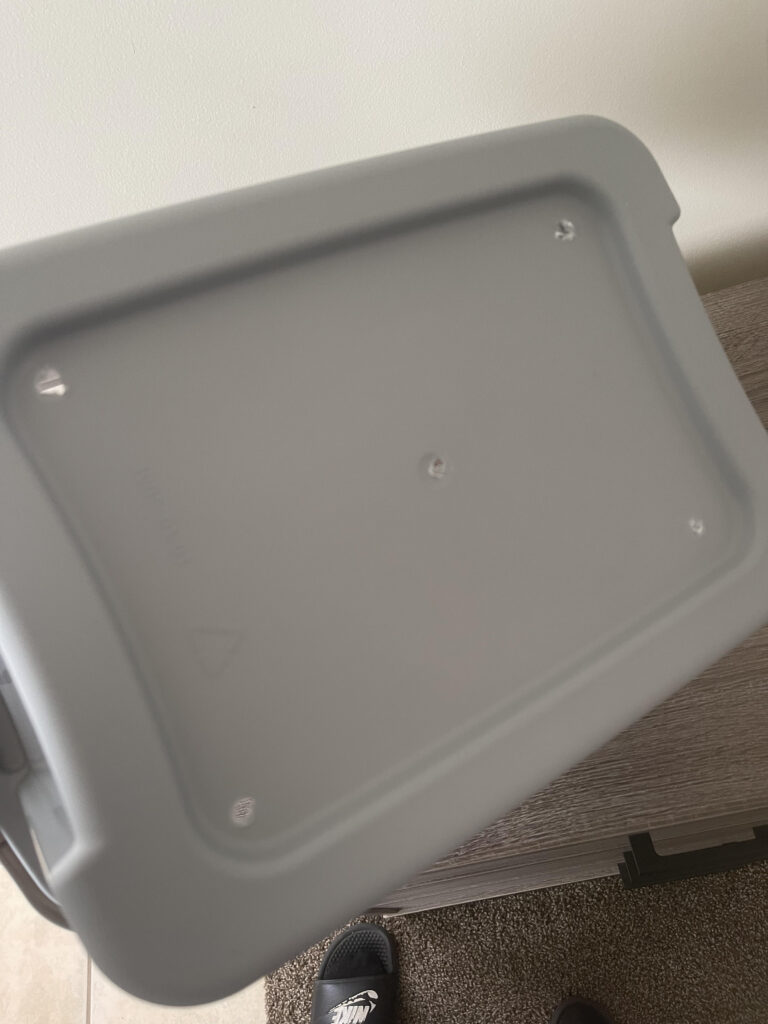
Grown-up job: Make a pattern of small ventilation holes high on the sides and in the lid. If you use drainage holes in the bottom, keep a catch tray underneath and make sure the holes don’t create escape or injury hazards. Drill slowly so rigid plastic doesn’t crack. Smooth any sharp edges before children help with the next step.
Step 2: Turn cardboard into comfortable bedding
Tear plain corrugated cardboard into small strips. Let the kids help with this part. It’s messy enough to feel fun and simple enough that everybody can participate.
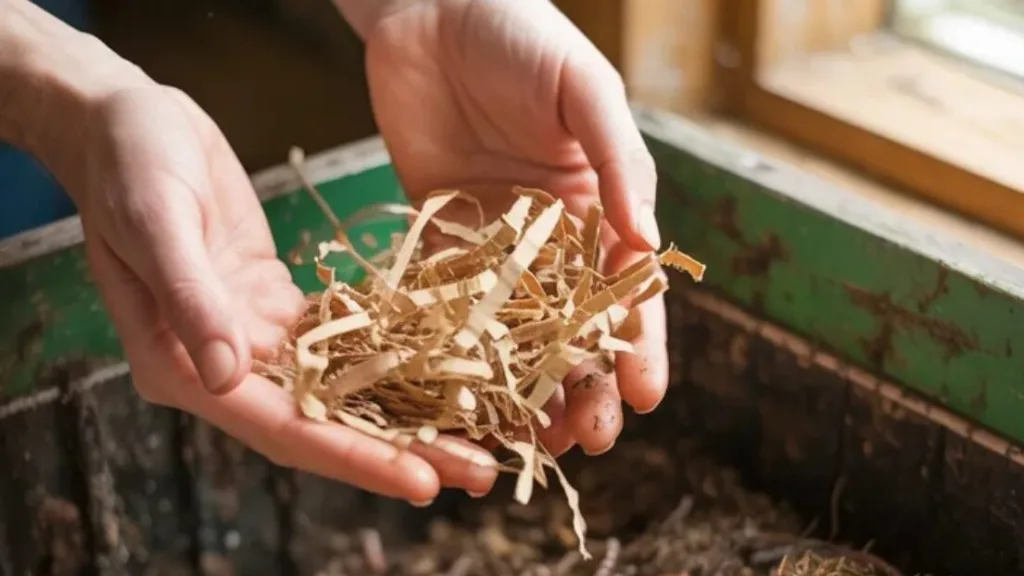
Wet the cardboard, then squeeze a handful. You’re aiming for the feel of a wrung-out sponge: damp, fluffy, and not dripping a stream of water. If it pours out when you squeeze, that’s too wet. Add more dry cardboard and mix lightly.
Put several inches of loose bedding in the bottom. Don’t pack it down like you’re stuffing a suitcase. Worms need moist spaces and airflow.
Step 3: Add the red wigglers and give them time
When your worms arrive, bring them in promptly and follow the supplier’s arrival instructions. Tip the worms and their shipping bedding gently onto the prepared bin. Keep the environment calm and shaded.
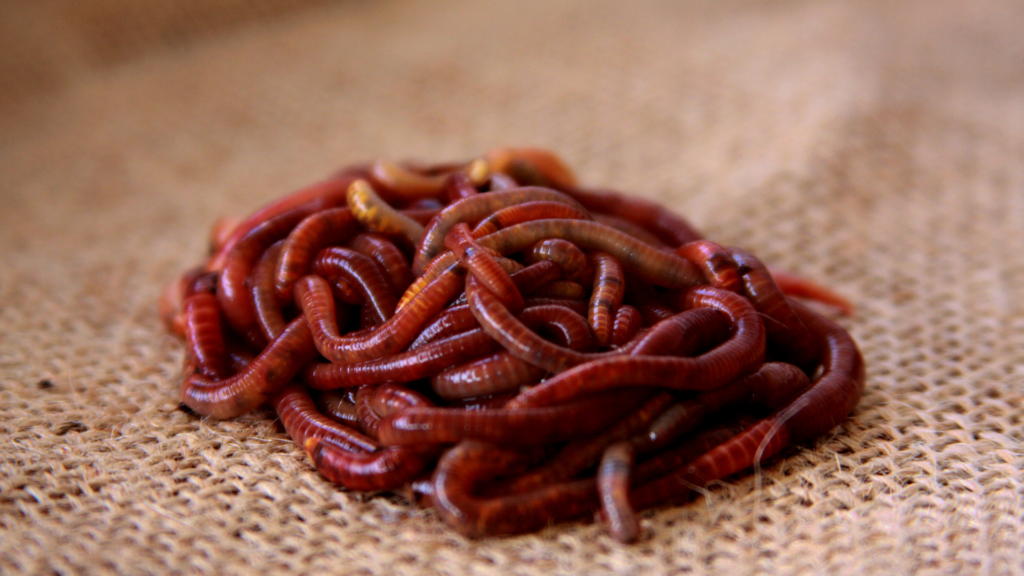
I usually recommend a day or two to settle before trying to feed much. Newly shipped worms have already had enough excitement for one week. A small light above an initially uncovered, supervised bin will make the worms burrow instead of escaping, but don’t use a hot lamp or leave the bin where it can dry out or overheat.
Have the kids observe from above. No squeezing, pulling, or keeping worms in their hands for a long time. Wash hands with soap and water after touching worms, bedding, or the bin.
Step 4: Offer their first tiny meal
Here’s the part kids love: choosing what’s on the menu.
Start with a small amount of chopped, plain fruit or vegetable scraps. A few pieces of soft apple, strawberry, or lettuce will do. Tuck the food under a little bedding in one spot so it’s less likely to attract fruit flies.
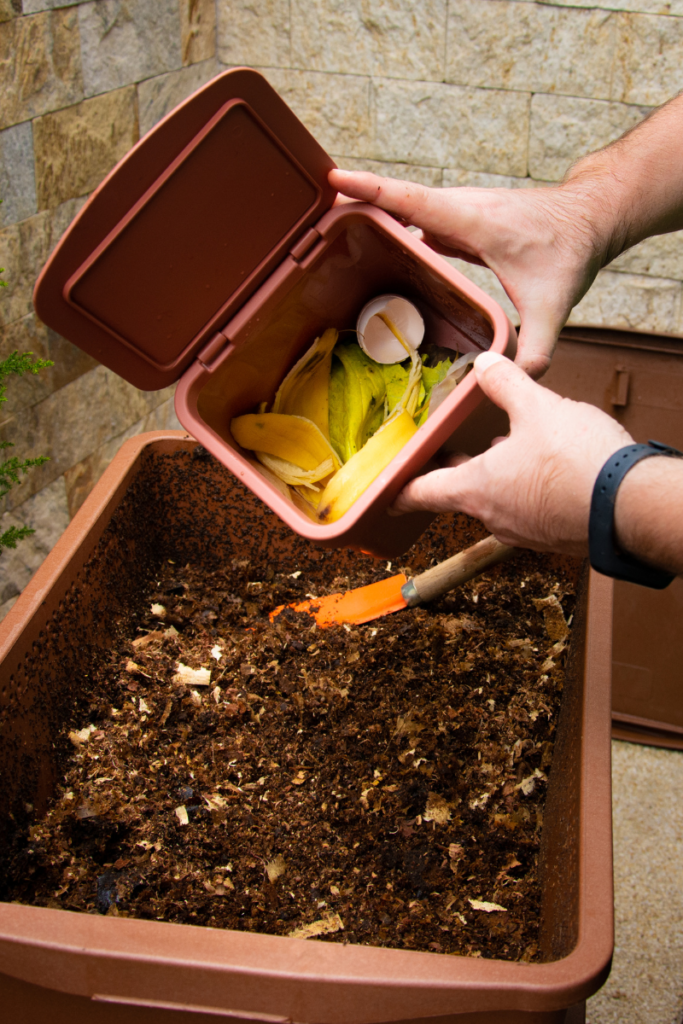
And please don’t feed again just because it’s Tuesday. Look at the last meal first. If recognizable food is still sitting there, wait. As I tell new worm farmers: feed less when you’re unsure. You can always add more later.
Keep out of this beginner bin: meat, fish, dairy, oily or heavily salted leftovers, pet waste, and large amounts of acidic or strongly flavored scraps such as citrus and onion.
Step 5: Find the bin’s happy place
Keep the bin in a sheltered spot with moderate temperatures. Red wigglers generally do well around 55–77°F, though the exact preferred range varies by source and conditions. Shade, airflow, moisture, and avoiding extreme hot or cold swings matter more than chasing one perfect number.
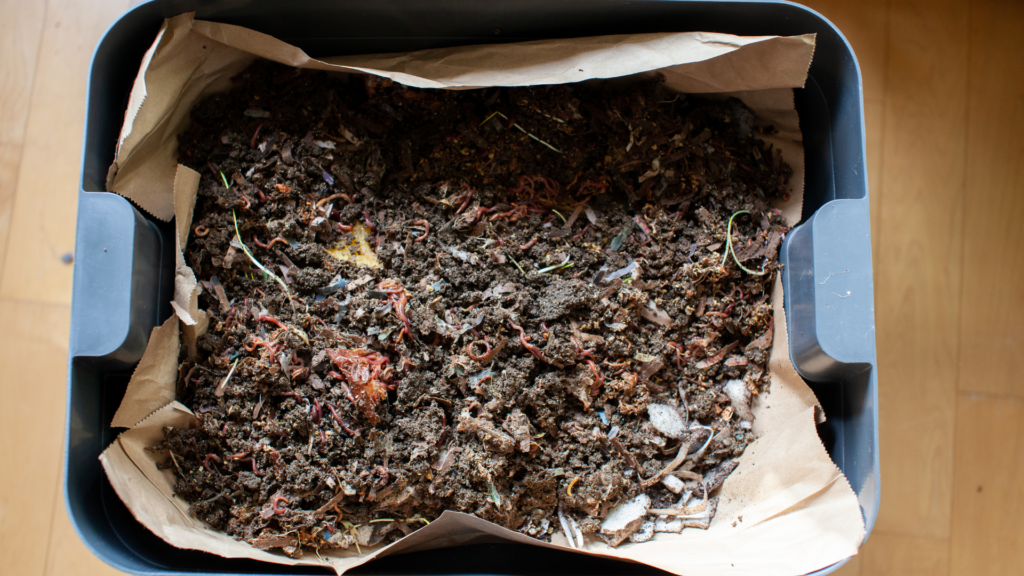
A worm thermometer is a nice optional tool because kids can turn temperature into a daily observation instead of a guessing game.
The 7-Day Junior Worm Farmer Experiment
Now we’re doing science. Nothing complicated: a quick check, a few notes, and a question each day. Check briefly and gently. Don’t dig up the whole worm family every morning.
Keep a simple record: Use this chart as a quick reminder, then put drawings, numbers, and predictions in your free printable journal.
| Day | Observe | Record |
|---|---|---|
| 1 | Starting bedding and habitat | Your first prediction |
| 2 | Where worms settle | Visible activity |
| 3 | First tiny feeding | What food went in |
| 4 | Moisture, smell, temperature | Any changes |
| 5 | Food sample appearance | Softer, smaller, or unchanged? |
| 6 | Bedding and worm activity | One new observation |
| 7 | Compare with Day 1 | What did you learn? |
Day 1: Set up the habitat
Write down what the bedding looks and feels like. Where did you put the bin? If you have a thermometer, record its first reading. Make a prediction: Where will the worms spend most of their time?
Day 2: Watch the worms settle
Lift the lid with an adult and look at the surface. Do you see worms out in the light, or have they moved below the bedding? Don’t keep pulling bedding apart to find them. Record what you notice.
Day 3: What’s on the menu?
If the worms have settled and the bin smells earthy, bury one small, measured food sample. Draw it before it goes in. Can your young scientist predict what will happen to it?
Day 4: Check the conditions
Is the bedding still damp like a wrung-out sponge? Is the temperature different? Does the bin smell earthy, sour, or unpleasant? Fix conditions with a grown-up if needed; otherwise, leave things alone.
Day 5: Look for a change
Gently peek at the food spot without disturbing lots of bedding. Does the sample look softer? Smaller? Exactly the same? Don’t make up results just because you expected something dramatic. Science is about what happened, not what was supposed to happen.
Day 6: Look for the cleanup crew
Without digging around, see whether you can spot worms, tiny decomposers, or darker, crumbly material. Worm castings take time to accumulate. Don’t expect a whole bucket of finished compost by Saturday.
Day 7: Compare and explain
Look back at your Day 1 and Day 3 notes. What changed? What surprised you? Did your prediction hold up? Pick one new question to investigate over the next few weeks.
Free printable: Download the Junior Worm Farmer Observation Journal to log moisture, temperature, food changes, drawings, and your child’s conclusion.
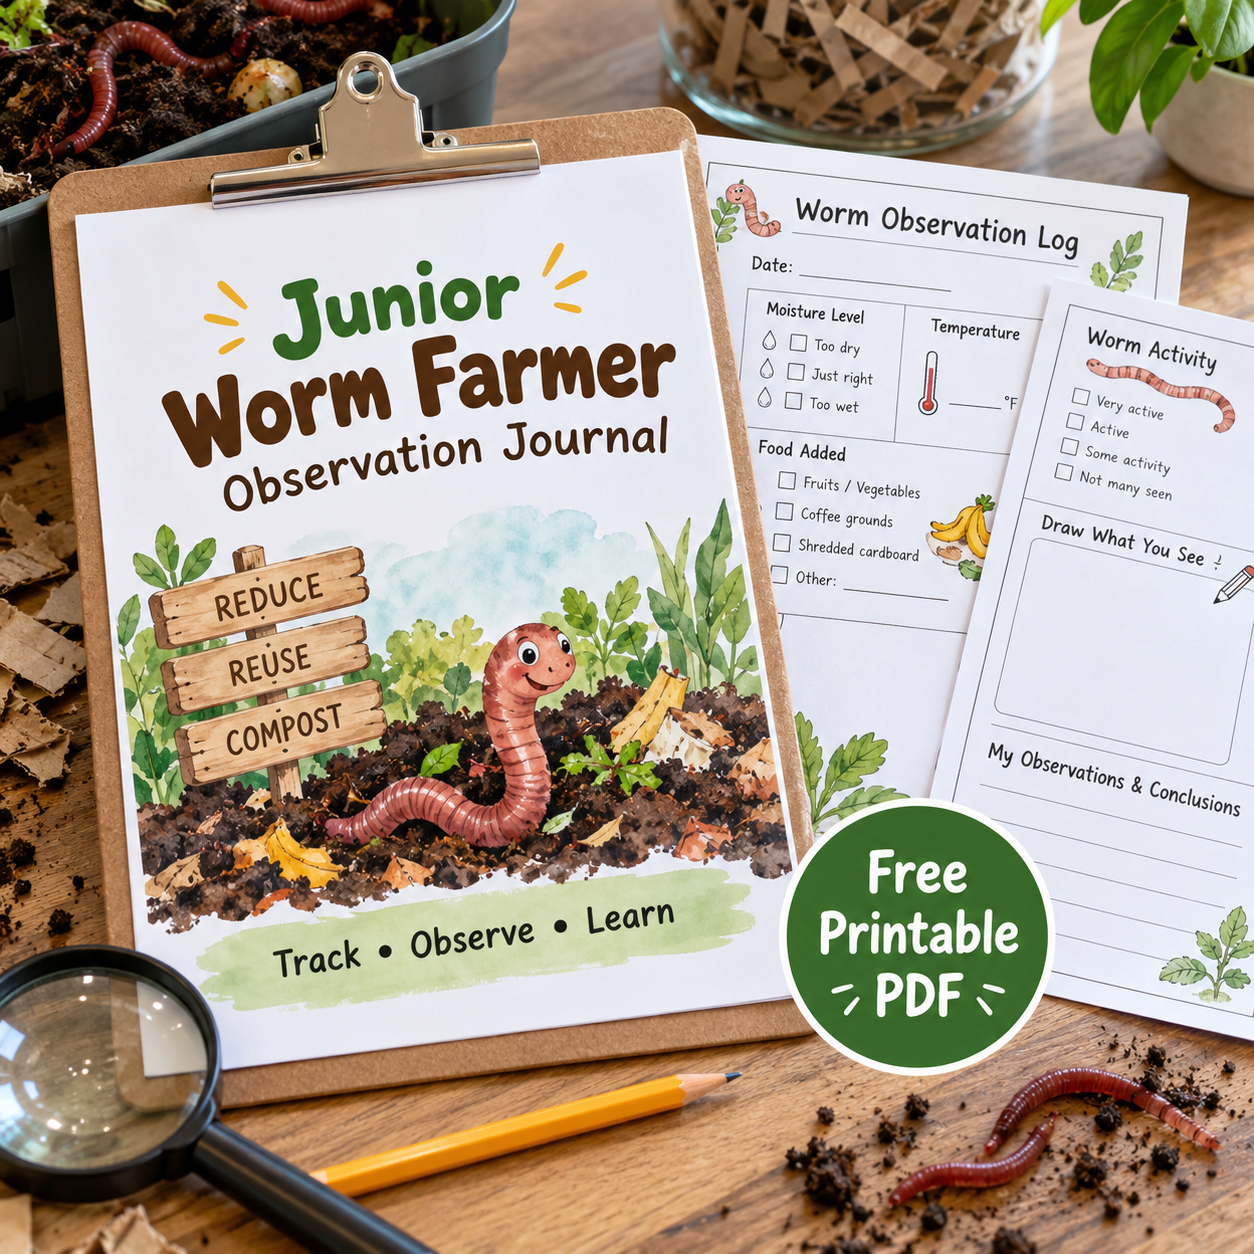
Calling All Junior Worm Farmers! Ready to become a worm detective? Track your wiggly friends, uncover their secrets, and make amazing discoveries! Download your FREE science journal and let the worm adventure begin!
DIY Tote vs. VermiHut vs. Worm Factory 360: Which Should You Pick?
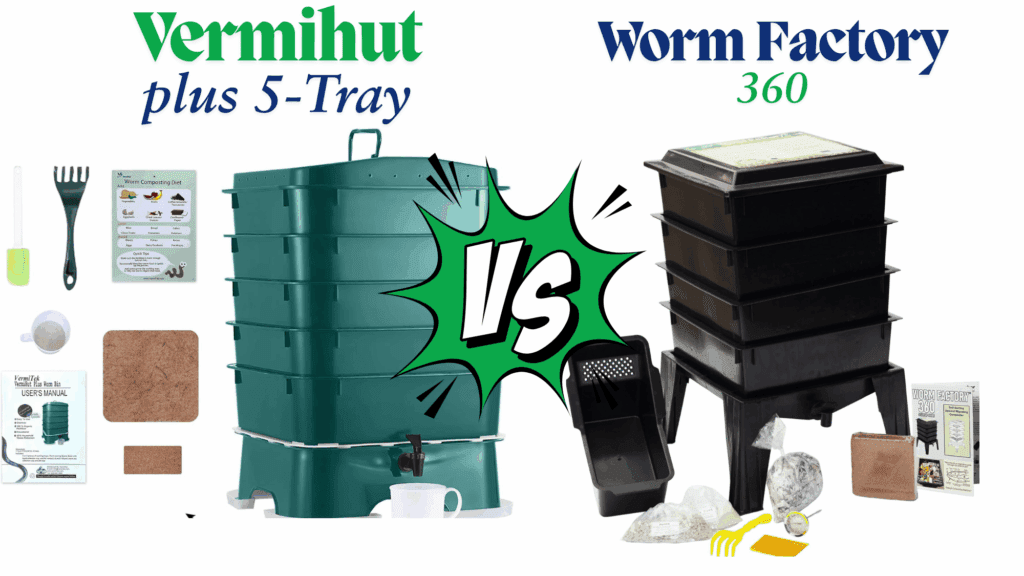
I want to be clear about something: you don’t have to buy an expensive worm bin to do this project. The DIY tote is my first recommendation, but not everybody wants to handle tools or drill plastic, so it’s worth showing the alternatives.
Quick pick: DIY tote for the simplest and lowest-cost start; VermiHut Plus for a ready-made multi-tray bin; Worm Factory 360 for another expandable option worth comparing. Kids can learn the same science with any of them.
1. DIY tote: The budget-friendly classroom
Who it’s for: First-timers, parents, homeschoolers, and anybody who wants to learn the basics before spending extra money.
I use DIY bins myself. They’re easy to inspect, straightforward to fix, and they teach you what really matters: moisture, bedding, food, airflow, and patience. Use cardboard you already have and put the money toward good worms.
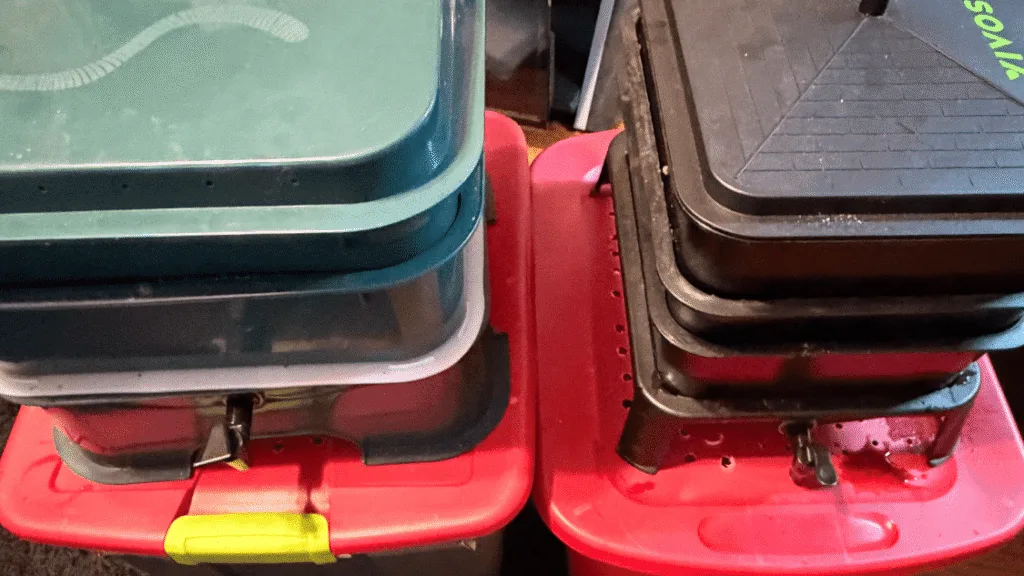
Trade-off: An adult has to prepare the holes, manage any drainage, and keep a closer eye on conditions as everyone learns.
2. VermiHut Plus: The ready-made bin I also use
Who it’s for: Families who want an organized tray-style system without building one from scratch.
I also use a VermiHut, so this isn’t some random product I’m listing because it looks cool on Amazon. A ready-made multi-tray worm bin can be a nice next step if your family enjoys the project and wants to keep composting food scraps.

Trade-off: It costs more than a tote, and the kids’ seven-day experiment is still the same basic science. A fancier bin doesn’t make the worms hurry.
3. Worm Factory 360: The expandable premium alternative
Who it’s for: Households looking for a longer-term, expandable composting setup.
The Worm Factory 360 is another established four-tray starter system. It offers an upgrade path for someone who knows they’re sticking with vermicomposting. I haven’t personally tested this exact model, so I’d compare its features and cost rather than pretend it’s my own experience. Plus, when I bought my VermiHut, it was on sale, so it came out to the same price as one of these, and I made an executive decision without talking to the worms about it.

Trade-off: It’s more of an investment than this children’s project requires. My rule still applies: learn the worms first, upgrade the bin later.
A note on bedding upgrades
If you’ve got plain shredded cardboard, you’ve already got a great starting material. Some worm farmers like to mix in hydrated coconut coir for moisture retention, but it isn’t required for this family activity. Make sure the bedding is loose and damp, not packed or saturated.
What Kids Should Notice After 7 Days — and What Takes Longer
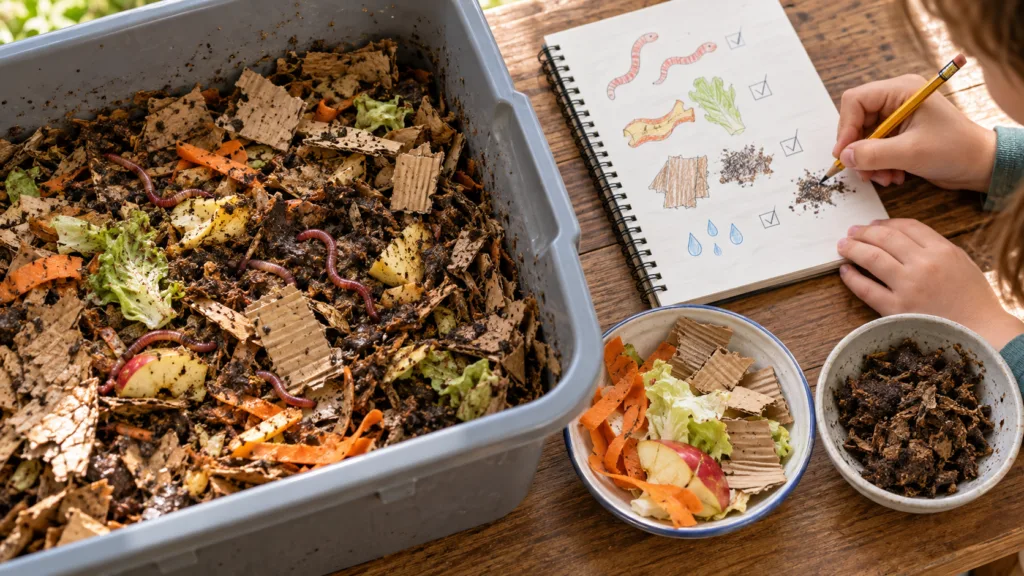
You might notice a little food softening, some worm movement, or a change in the moisture of the bedding. You also might notice very little. Temperature, food size, worm activity, and the condition of a newly started bin all influence what happens.
A week is an observation challenge, not a compost-production deadline. A mature bin can produce useful castings over the following months, and cocoon spotting is a bonus, not an assignment.
If your child wants to keep going, turn the experiment into a 30-day challenge. Check the bin weekly, record feedings, and make a new prediction each time.
Weeks two through four: Keep checking moisture and temperature, track when the last feeding becomes less recognizable, and add food only as the worms process it. Have your child make a new drawing or take a photo each week. Changes happen at different rates, so let the observations—not a deadline—tell the story.
Common Problems (And What I’d Do First)
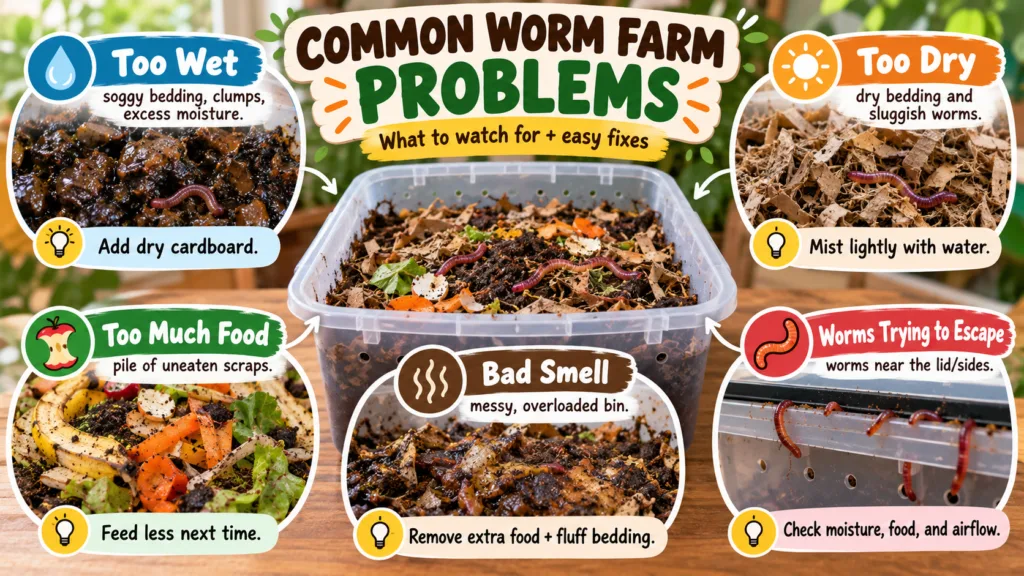
The bin smells bad
Pause feeding. Remove obvious excess rotting scraps, add loose dry cardboard if it’s too wet, and check airflow. A healthy bin should smell more like damp earth than forgotten leftovers.
There’s too much uneaten food
Remove excess scraps before they spoil, then pause feeding until the last small meal is mostly processed. Next time, feed less and tuck it beneath the bedding in one spot. You can always add more later.
The worms are trying to escape
Check temperature, moisture, and airflow before blaming the worms. Newly introduced worms sometimes wander, but persistent escape behavior is a reason to troubleshoot conditions.
Nothing looks like it’s happening
Congratulations, you’re learning the hobby’s least glamorous lesson: patience. Don’t keep stirring up the bin. Check the last meal, keep bedding comfortable, and allow the microorganisms and worms to work.
The bedding is soggy
Mix in dry shredded cardboard and make sure excess water isn’t pooling. Worms need moisture and oxygen.
The bedding is too dry
Add a little water gradually, mix gently, and squeeze a handful. It should feel like a wrung-out sponge—not crispy or dusty, and not dripping. Check whether the bin is getting too hot or drying out.
Tiny flies showed up
Bury food more deeply, remove exposed scraps, and reduce the portion size. That’s usually more useful than buying another gadget.
What About Safety With Kids?
Keep this an adult-supervised activity, especially for drilling holes, handling tools, preparing the container, and managing live worms. Teach kids to handle worms gently and wash their hands with soap and running water after touching worms, bedding, tools, or finished compost. Don’t eat during bin time. Keep the system away from food-preparation surfaces and out of reach of toddlers and pets.
For classrooms or group activities, follow your school’s animal-handling and hygiene policies. Remember that the bin is a living habitat, not a toy that needs to be emptied and inspected every five minutes.
Frequently Asked Questions
Can kids make a worm farm in a jar?
A clear jar can be useful for a brief, supervised observation, but it’s not my first choice for the worms’ permanent home. Worms need darkness, stable conditions, moisture, and ventilation. A ventilated plastic tote is better for keeping them long-term.
How many red wigglers do you need for a kids’ worm farm?
Start with a small population that matches the bin’s size and how little you’ll feed. A supplier’s approximately 500-worm half-pound offering can suit an appropriately sized starter tote, but you don’t need to buy more worms than the bin can support.
Do kids need to feed their worms every day?
Nope. Check the old food first. If it’s still easy to recognize, don’t add more just because the calendar says so. Overfeeding causes more trouble than underfeeding at the beginning.
Can the worm farm stay indoors?
Yes, if it’s well ventilated, managed properly, and kept in an appropriate location. A healthy bin shouldn’t have a strong rotten-food smell. Choose a spot that stays cool enough and away from food preparation.
Will there be finished worm castings in seven days?
Not necessarily. Seven days is enough to begin tracking changes, not a promise of finished vermicompost. Allow several weeks to months as the bin matures.
Is the liquid draining out of a bin the same as worm castings tea?
No. Draining liquid (leachate) is not the same as deliberately prepared worm castings tea. Don’t treat mystery drainage from a new worm bin as a kid-safe fertilizer or garden drink.
The Best Part? They Get to See Where Food Goes
Maybe your kid becomes obsessed with worms. Maybe they just learn that a lettuce leaf doesn’t magically disappear. Either way, they’ve built something, looked after living creatures, and practiced paying attention.
That’s a pretty good science project in my book.
Start with a tote. Keep the bedding like a wrung-out sponge. Give the worms a small meal. Then try the hardest trick in worm farming: walk away and let them work.
Y’all have fun with it. And if your little scientist comes up with a funny worm name, I’d love to hear it.
Ready to start? Prepare the tote before your worms arrive, print the free journal, and let your young scientist lead the observations. A tiny feeding and some patience can teach more than a fancy setup.
Helpful next reads from The Worm Farmers
- Let’s Make a Worm Farm for Your Garden: DIY Style — for the general garden-focused DIY approach.
- The Ultimate Worm Bin Setup — for more detailed equipment choices.
- Worm Smoothie Method — for the more advanced feeding method after your bin is established.
- The Ultimate Red Wigglers Composting Guide — for troubleshooting and beginner care.
Sources and science references
- Alabama Cooperative Extension: Vermicomposting: Worms at Work
- University of Maryland Extension: Indoor Worm Composting
- Cornell: Worm Composting in Schools
- EPA: Approaches to Composting