

If you’re wondering which worm composting bin is best for beginners, here’s something I’ve learned from keeping worms: you don’t need an expensive setup to get started.
Some folks love the convenience of a stacking worm tower. Others would rather grab a plastic tote, make a few ventilation holes, and get to work.
I’ve always liked keeping things simple. After all, worm farming is supposed to be an enjoyable hobby, not another job on your to-do list.
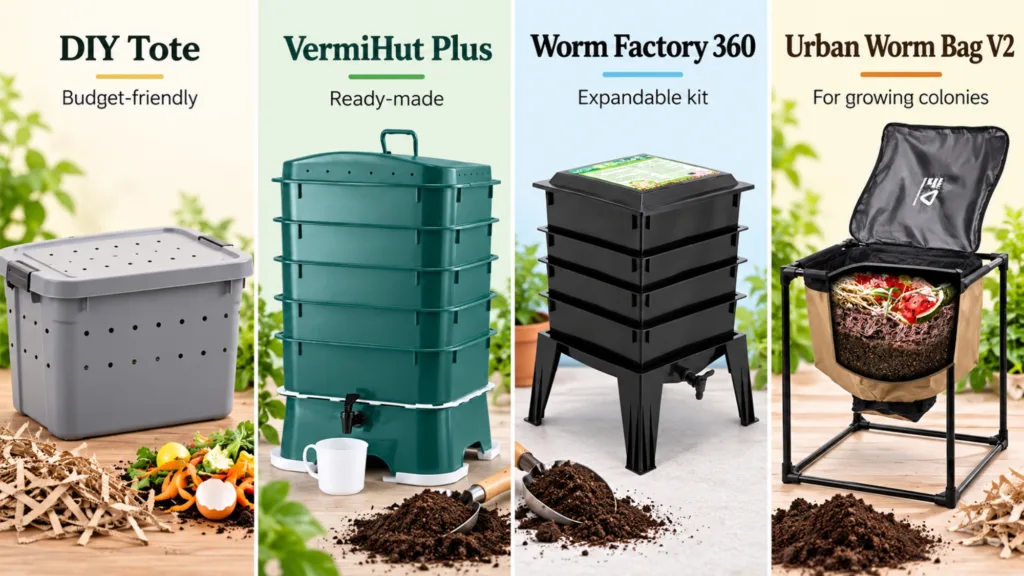
In this guide, we’re comparing four options: a DIY plastic tote, the VermiHut Plus, the Worm Factory 360, and the Urban Worm Bag Version 2. I’ll explain who each one makes sense for, where the trade-offs are, and what you actually need to get started.
Affiliate disclosure: Some links in this article are affiliate links. If you make a purchase through them, I may earn a commission at no extra cost to you. My recommendations are based on what makes sense for the worm farmer, not which bin costs the most.
Quick Answer: What’s the Best Worm Composting Bin for Beginners?
If you’re starting your first worm farm, I recommend a simple, dark plastic tote with a lid. It gives you room to learn how worms behave without spending a bunch of money.
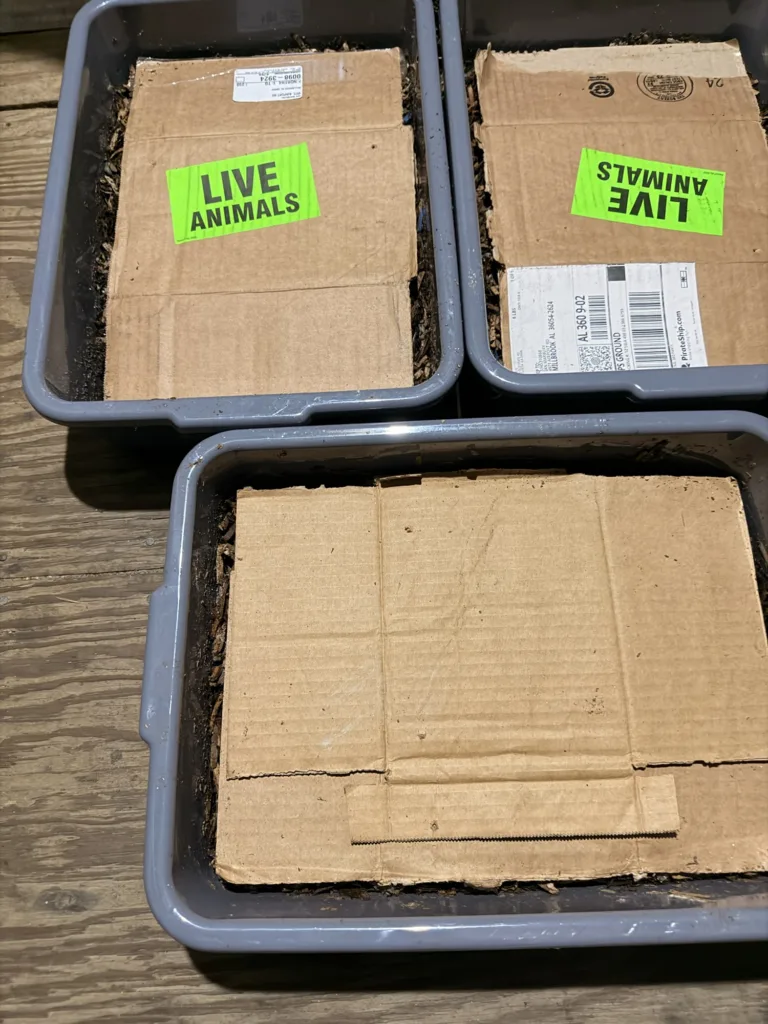
But not everyone wants to build a bin, and that’s perfectly fine. I currently use 3 plastic totes for grow-out bins and 6 bus pans to breed Red Wigglers and European Nightcrawlers.
| Worm bin | Cost and setup | Harvesting and best fit |
|---|---|---|
| DIY plastic tote | Usually the budget pick, especially if you already own a tote; you’ll add ventilation yourself. | Harvest by hand or move food to one side. Great for learning with a small colony. |
| VermiHut Plus | Ready-made stacking trays; more up front than reusing a tote, with some assembly. | Manage and harvest tray by tray. My top ready-made pick for price and everyday use. |
| Worm Factory 360 | Purchased stacking kit with setup instructions; check which accessories are included. | Tray-based harvesting; good if you want a guided, expandable setup. |
| Urban Worm Bag V2 | Larger purchase and a frame to assemble; needs more floor space. | Harvest mature castings through its removable bottom. An upgrade for an established colony. |
How I’d choose: Building your first bin on a budget? Use a tote. Want to buy a ready-made system? I’d choose the VermiHut Plus because I own two and like the value for everyday use.
The Worm Factory 360 is another reasonable tray kit, while the Urban Worm Bag is better suited to an established colony.
Prices change, and the cheapest option depends on what you already own. This is a practical comparison, not a live price chart. Check the seller’s total price and whether live worms are included before buying.
If you’re still deciding whether to build or buy, read my DIY vs. store-bought worm bin comparison.
What Actually Makes a Good Worm Bin?
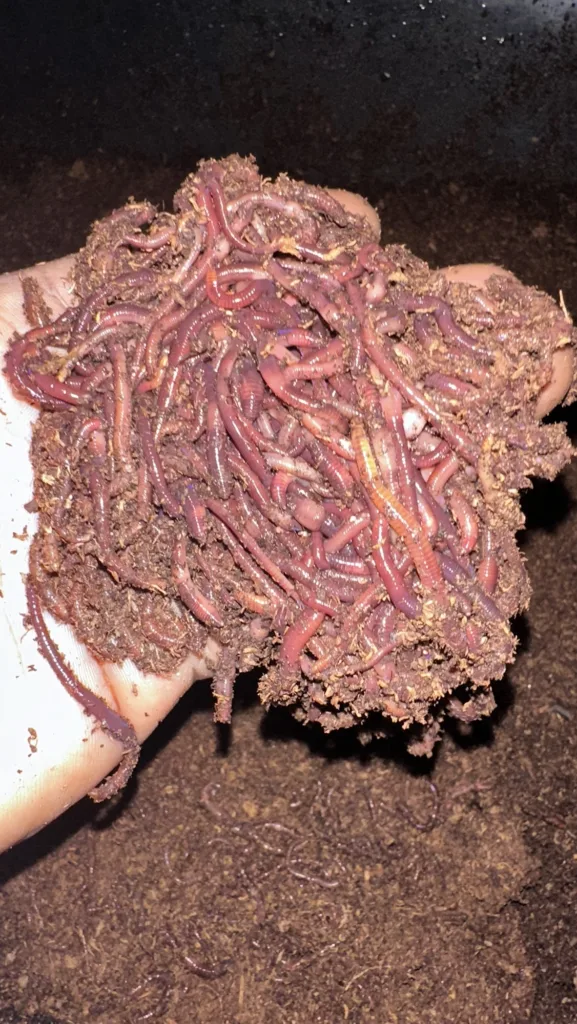
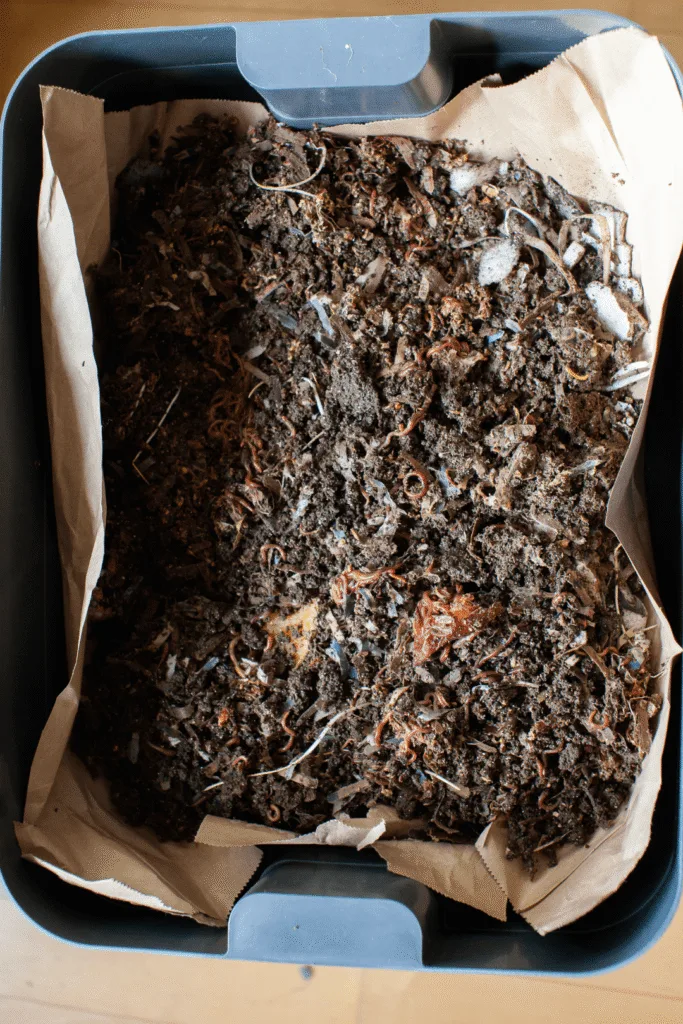
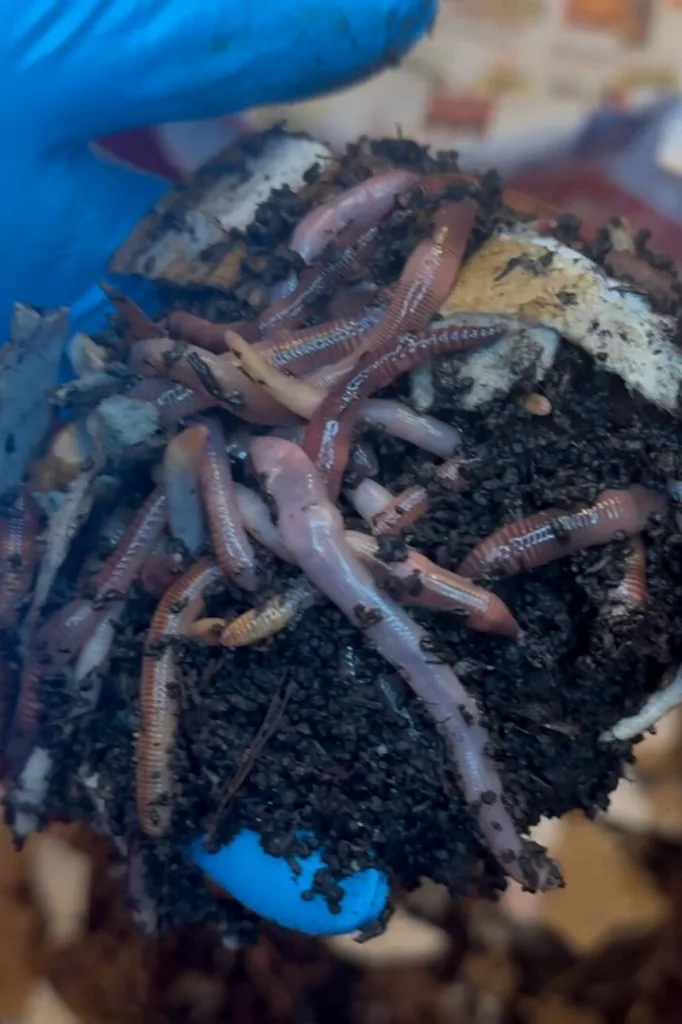
Forget the fancy marketing for a minute. Worms don’t care how much you spent on their home. They need a suitable environment, and it’s your job to provide one.
Good airflow
Composting worms need oxygen. A tightly sealed plastic container without ventilation is not a suitable worm bin. Whether you’re using a tote or a commercial tower, make sure the system has adequate airflow.
Moisture you can control
Your bedding should feel like a wrung-out sponge. Not soaking wet. Not dry and dusty. Plastic bins hold moisture well, which is helpful until things get too wet.
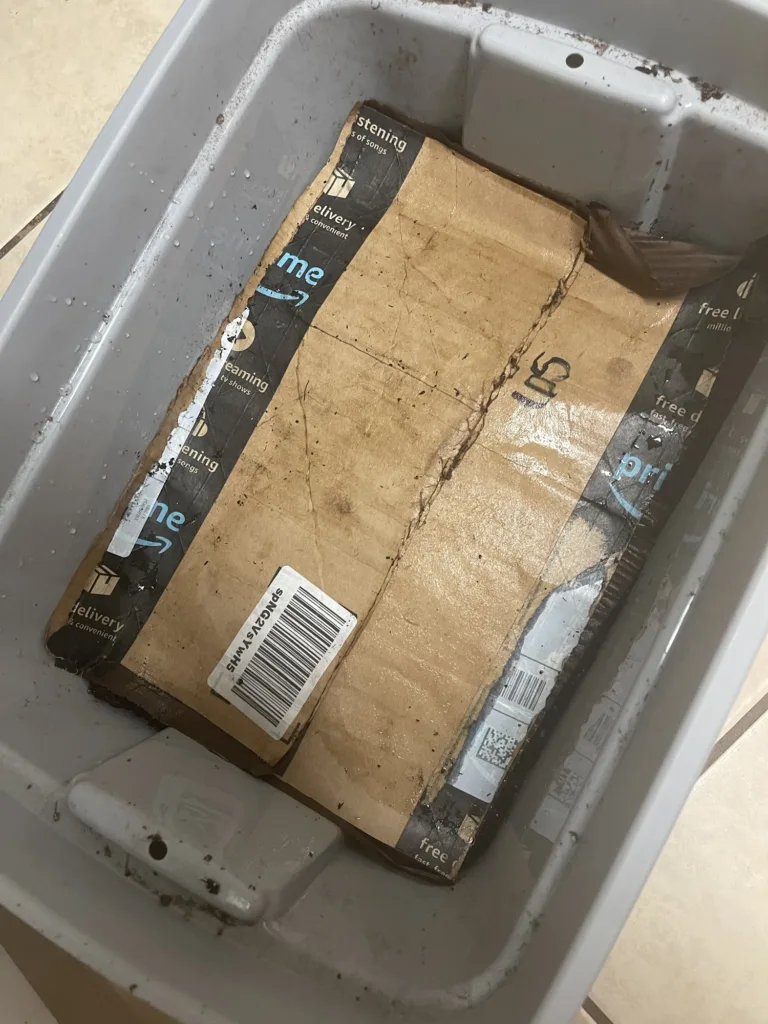
For beginners, a design with bottom drainage and a separate collection tray offers a useful safeguard. I also use carefully managed bins without bottom drainage holes, but that approach requires closer monitoring. Water should never collect in the bedding.
Enough room without going overboard
Don’t buy your bin based on how many worms you hope to have a year from now. Start with a manageable colony and feed according to how quickly the existing food breaks down. You can expand when you actually need to.
Easy access
You’ll be checking moisture, adding bedding, feeding, and eventually harvesting castings. Choose a setup you’re comfortable opening and working in regularly.
1. DIY Plastic Tote Worm Bin — Best Overall for Beginners
Best for: First-time worm farmers, smaller colonies, and anyone wanting an inexpensive start.
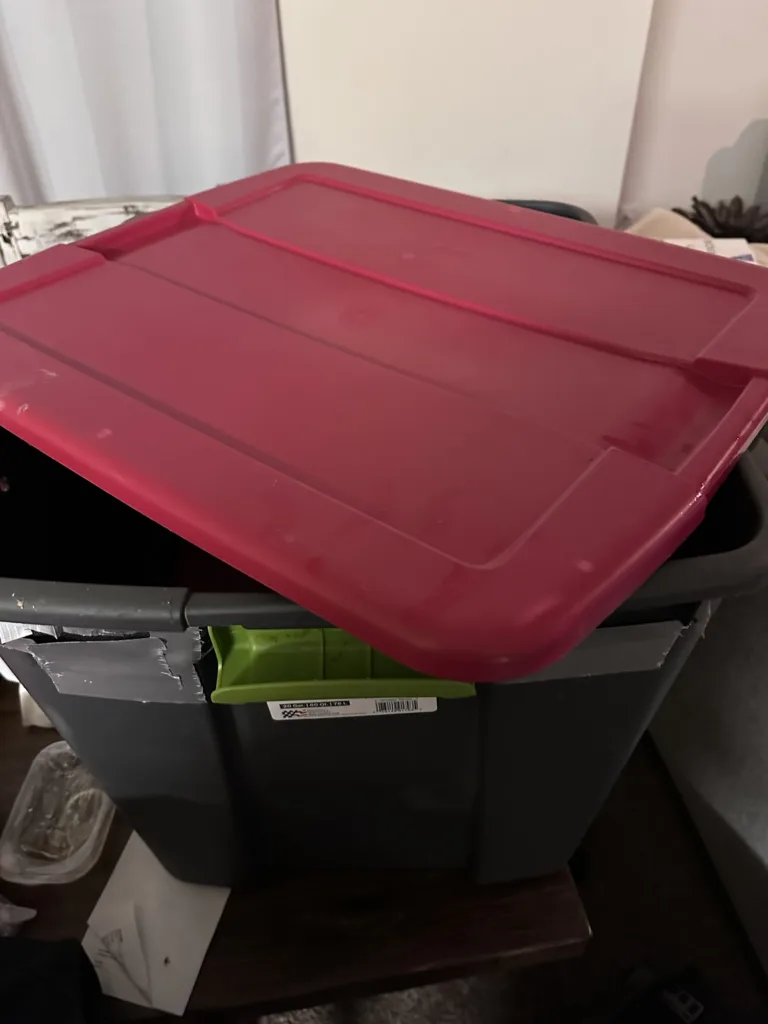
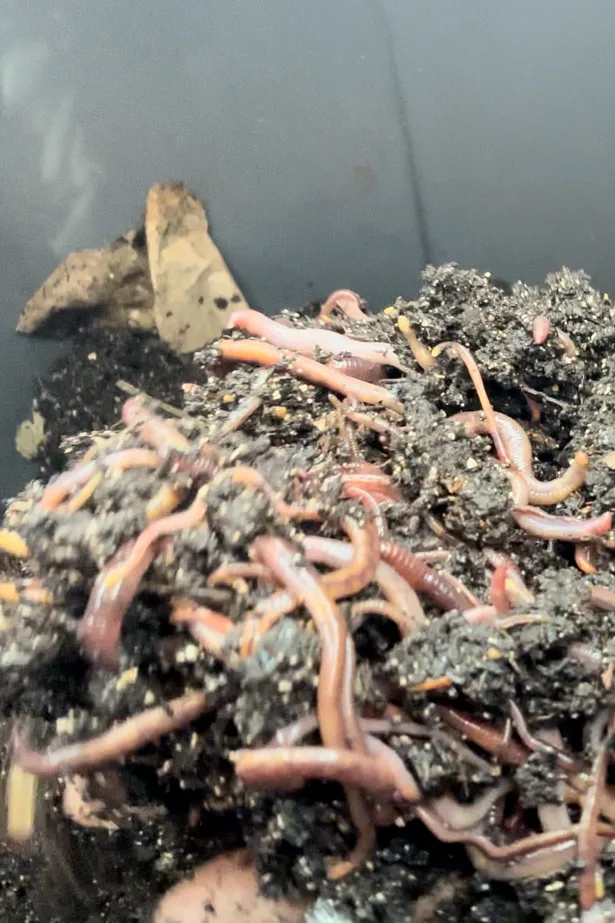
This is where I’d begin. A basic plastic storage tote with a lid can make a practical worm bin. You don’t need a stack of trays, a fancy spigot, or an elaborate harvesting system to learn worm composting.
What you do need is a suitable container, proper ventilation, damp bedding, and a little patience.
What I like about DIY tote bins
- They’re straightforward to set up.
- You can see what’s happening throughout the bedding.
- They’re easy to customize as you gain experience.
- You can start small instead of buying equipment you might not need.
- Replacement containers and supplies are usually easy to find locally.
The biggest trade-off is convenience. There’s no special tray system to separate finished castings from newer material. You’ll need to harvest by hand or use a method that encourages the worms to move away from finished material. But for a beginner, that’s not necessarily a bad thing. Working with your bin helps you learn what’s going on.
My simple starter setup
I would begin with an opaque tote, a lid, ventilation openings, and plenty of moist shredded cardboard. If you’re using a conventional DIY design, follow a reliable drainage-and-collection setup. If you’re choosing a tote without bottom drainage holes, monitor moisture closely and correct excess wetness before it becomes a problem.
Here’s my biggest first-bin tip: get the worms’ home ready before ordering the worms. Moisten your shredded cardboard, set up the ventilation, and let everything settle for a day or two. Then, when the worms arrive, you’re not scrambling around trying to build their house.
Beginner tip: Don’t rush to feed a whole buffet of scraps on day one. Start small, see how your bin responds, and build from there.
Want the full instructions? Follow my 7-step guide to building a DIY worm farm.
2. VermiHut Plus — Best Ready-Made Choice for Beginners
Best for: Anyone who wants an organized worm farm without building a bin from scratch.
If you’d rather buy a worm bin instead of building one, the VermiHut Plus is my top ready-made pick. I personally own two of these bins, so this isn’t a recommendation pulled from a product description. For my setup, I like the balance of purchase cost and everyday use. You get an organized tray system without jumping straight to a much larger worm farm.
The standard VermiHut Plus offers five working trays and a lower collection area. Its design includes ventilation and moisture-management components. Instead of keeping everything in one container, you can introduce additional trays as the system develops.

What I like
- An organized, vertical design.
- Multiple working trays.
- A relatively compact footprint for the type of system.
- A purpose-built base and liquid-collection area.
- No need to design a bin from the ground up.
What to consider
Stacking systems still require attention. Food can build up, bedding can become too wet, and worms may not migrate between trays as quickly or evenly as you expect. No worm bin is automatically odor-free.
My take: If someone asks me which ready-made bin I’d buy first, I point them toward the VermiHut Plus. I like its value and the fact that I can work with trays as the colony develops. That doesn’t mean you can ignore feeding or moisture. It’s still worm farming! And if money’s tight or you’re testing out the hobby, start with a tote instead.
3. Worm Factory 360 — Best Expandable Starter Kit
Best for: Beginners who appreciate instructions, accessories, and an established stacking-tray design.
The Worm Factory 360 is another well-known commercial option. A standard four-tray package includes an organized tray system, a base with a spigot, and instructional materials. Depending on the seller and package, bedding materials and accessories may also be included.
The appeal here is straightforward: if you’d rather follow a kit’s instructions than design your own tote, the Worm Factory 360 takes some of that guesswork out. Just remember that four trays don’t magically mean four times the compost.

What stands out
- Four working trays in the standard starter configuration.
- Options for adding more trays.
- A base designed to collect excess liquid.
- Instructions to help you understand the system.
- A tray-based approach to managing and harvesting castings.
What to consider
More trays don’t automatically mean faster composting. You still need a healthy worm population, moist bedding, and an appropriate amount of food.
Check the specific seller’s listing. Don’t assume live worms are included. Packages and bundles vary. I haven’t independently tested every Worm Factory 360 package, so I’m distinguishing its published product features from personal experience.
My take: This is worth considering when you prefer a packaged system with instructions and room to expand.
4. Urban Worm Bag Version 2 — Best for Growing Colonies
Best for: Worm farmers with a growing colony and steady food-scrap supply who want a continuous-flow system without stacking trays.
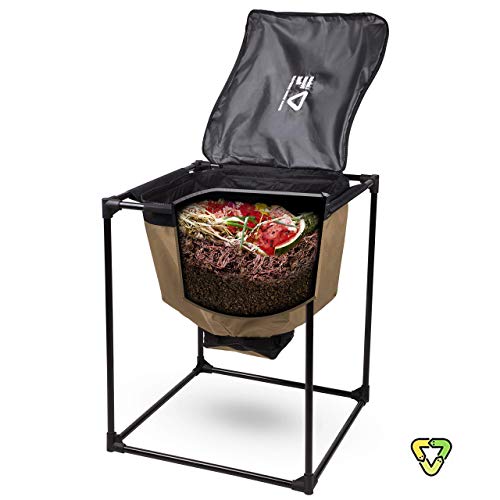
The Urban Worm Bag Version 2 takes a different approach from plastic stacking trays. It’s a breathable fabric worm farm supported by a metal frame.
You add food and bedding at the top and harvest more mature castings from its fully removable, zipper-free bottom.
The bag is designed for continuous-flow vermicomposting, but worms and castings still need time to become established.
What makes it different
- Durable, breathable fabric construction designed to help maintain airflow.
- A continuous-flow harvesting design.
- Less dependence on lifting and rearranging stacking trays.
- A fully removable, zipper-free bottom for harvesting castings without moving trays.
The trade-offs
It takes more space and costs more than a basic tote. The frame needs a level spot, and you still need to monitor moisture, feeding, and temperatures. You won’t have finished castings ready to harvest immediately after setting up a new bag.
My take: For a first worm farm, I’d still start with a DIY tote or a manageable tray kit. But if your colony and feeding routine have grown, the Urban Worm Bag Version 2 is worth considering.
I haven’t personally tested this system, so these product features come from the manufacturer’s specifications rather than a hands-on review.
Honorable Mention: Bus Tubs — The Unsung Heroes of Worm Farming
Best for: Mixing bedding, sorting worms and cocoons, starting breeder bins, and keeping smaller worm-farming projects organized.
Sometimes the most useful piece of equipment isn’t a fancy worm tower. It’s a plain old bus tub. Seriously! I use bus pans all the time, and they’ve earned their place in my worm-farming setup.
You know those sturdy plastic tubs used in restaurants to clear tables? Those. They’re also pretty handy when you’re working with worms. And if you need a little more room, shallow concrete mixing pans are another simple option worm farmers use. No elaborate build required. It’s almost a DIY worm bin without the DIY. Almost.
What I Actually Use Bus Tubs For
- Mixing and preparing bedding: I can wet down shredded cardboard, mix everything together, and get it ready before I put it in the worm bin. A lot less mess than trying to do it all in a working bin.
- Separating worms from cocoons: The open, shallow shape gives me room to sort through material without digging around in a deep container.
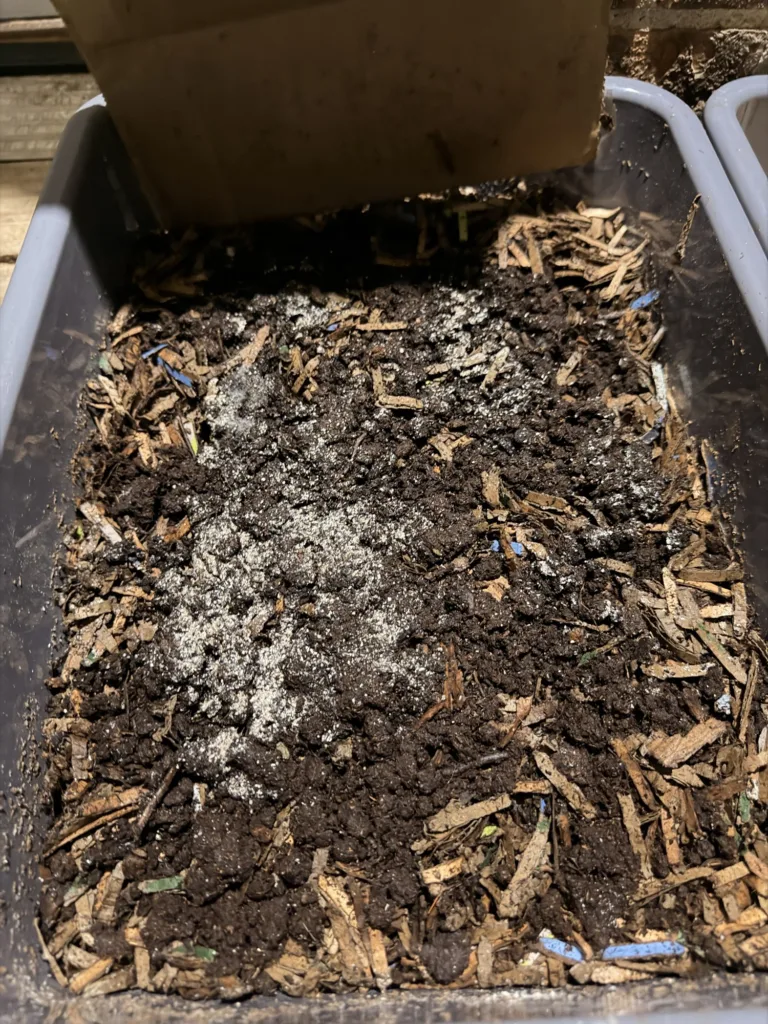
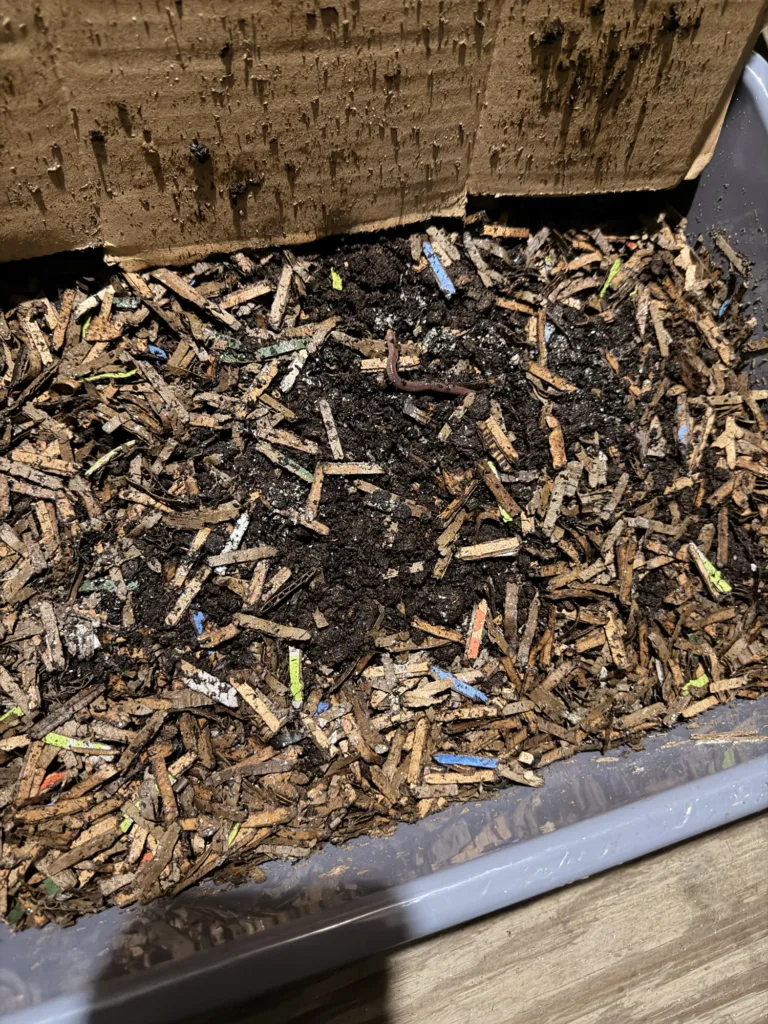
- Starting breeder bins: I’m using bus pans for my European Nightcrawler breeder bins. When I want to keep a closer eye on a smaller group, I like having a simple setup I can access easily.
- General worm-farm chores: When I’m moving bedding or sorting material, having an extra tub nearby makes the job easier. Nothing fancy, but you’ll use it more than you think.
This is where my own setup comes in. I’ll show you the actual bus pans I’m using for my European Nightcrawler breeders so you can see what this looks like outside a product listing.
Bus Tubs vs. Concrete Mixing Pans: Which Makes Sense?
Both can be handy. For smaller sorting jobs and breeder setups, I like the manageable size of bus tubs. A concrete mixing pan can give you more open working space for bedding or larger sorting jobs. Look at the actual dimensions and depth rather than assuming every tub or pan will fit your setup.
One important distinction: Mixing bedding in a tub and housing live worms in it are two different jobs. If you use one as a breeder bin or a permanent worm home, you still need airflow, moist bedding, and protection from heat and drying out. An airtight lid is a no-go. A shallow, open tub can lose moisture faster, while an unvented covered tub can get stuffy. If there’s no bottom drainage, make sure excess water isn’t collecting in the bedding.
Which Bus Tub Pack Should You Buy?
I wanted to give you options instead of making you buy a giant stack of tubs you don’t need. If you’re working with multiple breeder bins or sorting a lot of worms, a 12-pack may make sense. If you’re just getting started or need a few extra working tubs, a smaller multipack is probably plenty. Check the actual pack quantity and lid options on each listing.
With lids or without? Go with lids if you need covers for storage or a worm setup with proper ventilation. If you’re mainly mixing bedding or temporarily sorting worms, you may not need lids at all. Don’t pay for extras you won’t use.
-
 Shop Amazon$82.46
We earn a commission if you make a purchase, at no additional cost to you.
11/14/2026 04:47 pm GMT -
 Shop Amazon$63.82
We earn a commission if you make a purchase, at no additional cost to you.
11/14/2026 04:47 pm GMT -
 Shop Amazon$33.22
We earn a commission if you make a purchase, at no additional cost to you.
11/14/2026 04:47 pm GMT -
 Shop Amazon$29.55
We earn a commission if you make a purchase, at no additional cost to you.
11/14/2026 04:47 pm GMT
My take: I wouldn’t tell a complete beginner to rush out and buy 12 bus tubs. But if you’re breeding worms, separating cocoons, or just trying to keep the mess under control, a few good pans are worth having around. Sometimes the simplest tools end up doing the most work.
What Do You Actually Need to Start Worm Composting?

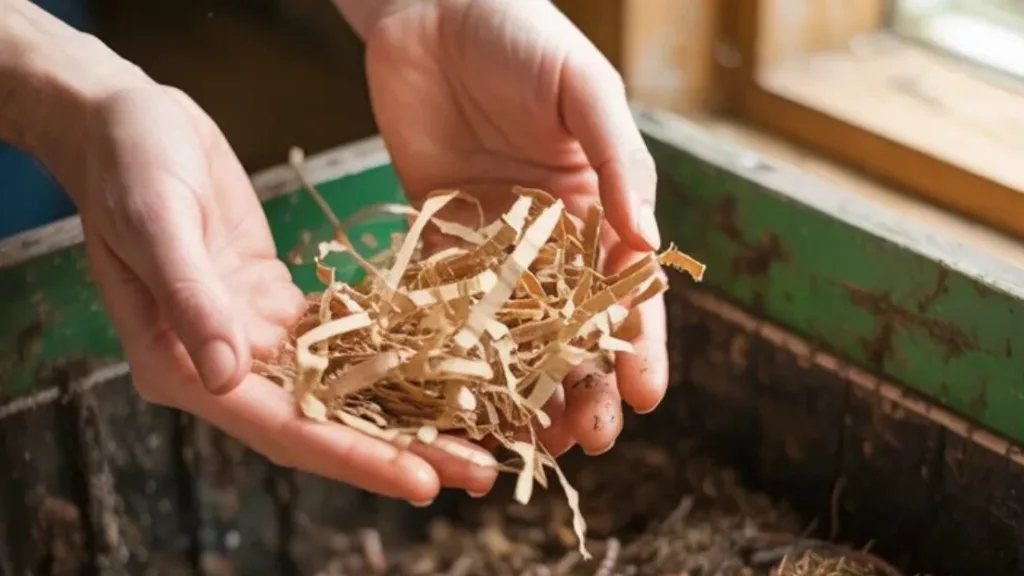
You can make your first shopping list pretty short.
A suitable worm bin
Use a simple DIY tote or one of the ready-made systems above.
Bedding
Plain shredded cardboard is one of my favorite materials for beginners. Moisten it, mix it loosely, and leave enough air space throughout the bedding.
You can use other suitable bedding materials, including coir, but you don’t need to buy everything you see recommended online.
Composting worms
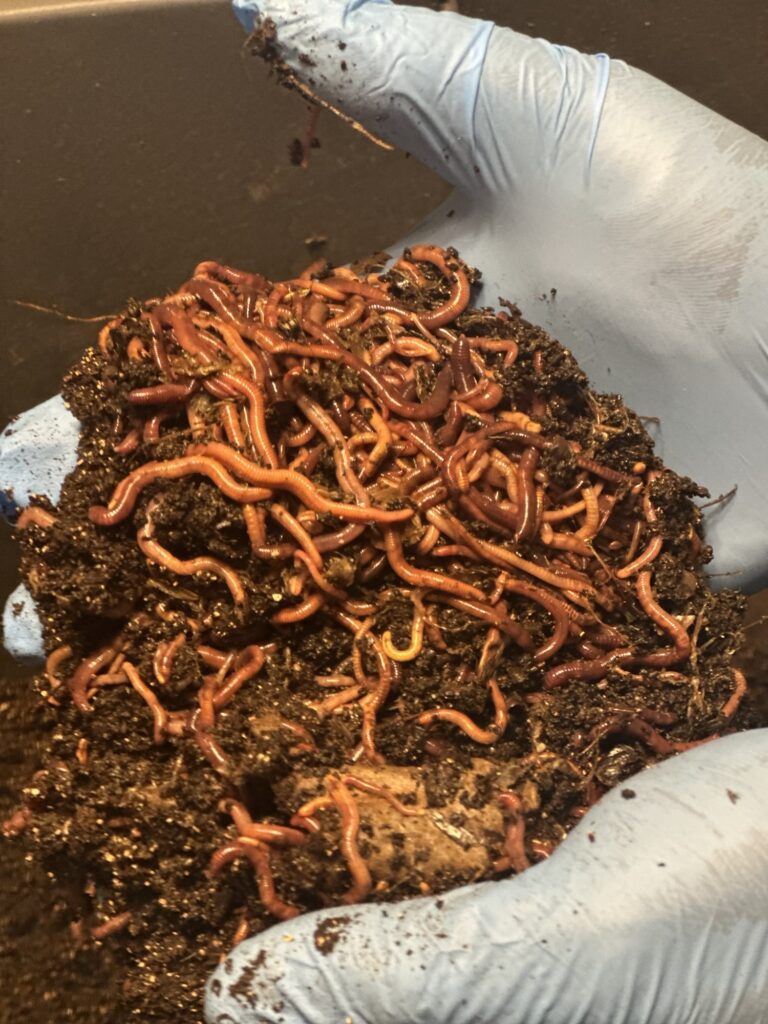
For most beginners, I’d start with red wigglers. They’re well suited to decomposing organic material in a worm composting bin. Prepare the container before ordering worms so they have somewhere ready to go when they arrive.
For live composting worms, Meme’s Worms is a supplier I recommend. I get my worms and other supplies, like worm chow, different bedding mixes, coco coir, courses, etc., from Meme’s Worms. The bins I showed you above- those worms came from there.
A little food and a lot of patience
Start with a small amount of suitable produce scraps. Bury food beneath the bedding and check its condition before adding more. Feeding too much too quickly is one of the easiest mistakes to make.
My rule is simple: If you’re unsure whether to feed more, wait and check the bin first.
For more, read the worm-bin feeding guide.
Your First Week With a New Worm Bin
Got your bin picked out? Good. Now let’s make sure those worms have a decent place to live. You don’t need a complicated schedule, but these are the checks I’d make during week one.
- Before your worms arrive: Put the bin in a sheltered spot, make sure air can get in, and prepare loose shredded-cardboard bedding. It should feel like a wrung-out sponge. I like getting the bin ready a day or two ahead of delivery.
- Arrival day: Check the condition of your worms, add them gently to the moist bedding, and cover the bin. If the shipping material is dry, moisten the bedding appropriately rather than pouring water over the worms. Check the seller’s arrival instructions.
- First 24–48 hours: Give them time to settle in. A little exploring can happen, but worms repeatedly crawling out or gathering around the lid means you should check airflow, moisture, food, and temperature.
- Midweek feeding: Start with a small amount of suitable fruit or vegetable scraps tucked under the bedding. Think snack, not an all-you-can-eat buffet. Don’t pile on more food just because it’s feeding day.
- End-of-week check: Is the food softening? Does the bin smell earthy? Is the bedding still damp but not dripping? If it’s sour or soggy, pause feeding, remove obvious excess scraps, and mix in dry shredded cardboard.
One last thing: You don’t need to dig through your worms every day to make sure they’re working. Check conditions, make small adjustments, and learn to walk away. It’s a hobby, not another full-time job.
For more feeding ideas once your worms settle in, use my worm feeding guide.
One Important Thing About Worm Bin Drainage
Let’s clear up something that confuses a lot of beginners. The liquid that drains from a worm bin is called leachate. It’s not the same thing as worm castings tea made from finished vermicompost.
Leachate drains through food and bedding that may not be fully broken down, so its contents can vary. Advice on using it as fertilizer varies by source.
My beginner recommendation: don’t treat that runoff as worm-castings tea or rely on it for edible crops and houseplants. Use finished vermicompost instead, and focus on preventing excessive liquid in the bin.
If your worm bin regularly produces a lot of runoff, pay attention. You may be adding too much moisture or too much wet food. Try adding dry shredded cardboard, adjusting feeding, and checking drainage.
If you’d like to learn the difference, see my separate guide on making worm castings tea.
Common Questions About Beginner Worm Bins
How do I set up a worm composting bin?
Start with a suitable bin that has airflow and a cover, add loose bedding that’s about as damp as a wrung-out sponge, and get everything ready before the worms arrive. Begin with a little food, then watch how quickly your worms work through it. If you want the actual build steps, I’ve got a beginner DIY worm bin guide that walks you through the process.
Can I use a regular plastic storage tote?
Absolutely. Choose an opaque container with a lid, provide ventilation, and manage moisture carefully. A drainage-and-collection arrangement is the straightforward option for beginners. A specialty worm tower isn’t required.
Do I need drainage holes in the bottom?
A conventional DIY design uses drainage holes and a separate catch tray, which many Extension guides recommend. Experienced worm keepers can also manage a bin without bottom drainage holes, but you must closely monitor moisture and prevent standing water. Either way, ventilation is necessary.
How many worms should I start with?
It depends on the bin, but here’s a useful real-world reference: University of Maryland Extension recommends about one pound (roughly 500–1,000 red wigglers) for its small indoor bin measuring approximately 21 × 15 inches. That’s an example for that setup, not a rule for every container. You can start with a smaller colony and let it grow—just feed less while it gets established. Ordering more worms than your bin and feeding routine can support won’t speed things up.
Can I keep a worm composting bin indoors?
Yes. A properly managed indoor worm bin should smell mild and earthy, not rotten. Keep it away from excessive heat, direct sunlight, and places where temperatures change dramatically. If something starts smelling unpleasant, investigate before adding more food. My worm-bin troubleshooting guide can help.
Where should I keep a worm bin during hot weather?
Shade alone isn’t always enough, especially in a hot garage or greenhouse. Check the temperature in the bedding, not just the weather forecast. For red wigglers, NC State Extension recommends keeping outdoor bins around 55–80°F (13–27°C). If the bedding is getting hot, move the bin to a cooler protected space. Direct sun can overheat even a shaded-looking plastic container.
What’s the easiest way to harvest worm castings?
It depends on the bin. In a DIY tote, you can move the old material to one side, add fresh bedding and food to the other, and let the worms gradually migrate before removing the more finished material.
Stacking systems use tray movement, although worms don’t always move on your schedule. With a mature Urban Worm Bag, you harvest from the bottom. Illinois Extension explains the side-migration method if you’d like to try it.
Which commercial bin is easiest for beginners?
For a ready-made bin, my personal pick is the VermiHut Plus. I own two, and for the price and everyday use it’s the option I’d recommend looking at first.
The Worm Factory 360 is worth comparing if you prefer a kit with detailed instructions. Neither bin takes care of the worms for you, though. If you’re just testing out the hobby and want to spend the least, start with a DIY tote.
Will a worm composting kit include live worms?
Not always. Many systems are sold without worms, while some retailers offer packages or vouchers. Read the actual listing before placing your order.
Sources and Further Reading
The recommendations above come from my experience keeping worms, plus published product information for bins I haven’t personally tried. These university resources are also handy for checking worm-care advice:
- University of Maryland Extension — Indoor Worm Composting or Vermicomposting (starter bins and stocking examples)
- NC State Extension — Earthworms and Worm Bins (species, airflow, and temperature)
- Illinois Extension — Harvesting Vermicompost (harvesting castings)
About the Worm Farmer Behind This Guide
I’m Ian, the guy behind The Worm Farmers. I raise red wigglers and European nightcrawlers, and my setup includes DIY totes, two VermiHut Plus bins, and bus pans I use for breeding and sorting. Those breeder-bin pictures are from my actual setup, not stock photos.
If I’ve used a bin myself, I say so. If I haven’t, I explain the features and trade-offs using product information instead of pretending I tested it. I’m here to help you find something that works for your space and budget, not convince you to spend more than you need to.
My Final Recommendation
If this is your first worm farm, start simple. Grab a suitable tote, prepare some cardboard bedding, and get comfortable caring for a small colony.
If building a bin doesn’t interest you, compare the VermiHut Plus and Worm Factory 360 based on how you want to feed, maintain, and harvest your system.
If you already have a thriving worm operation that needs more capacity, the Urban Worm Bag Version 2 is a larger, continuous-flow option worth considering.
Remember, you don’t need to get everything perfect on day one. Give your worms a decent home, pay attention to what they’re telling you, and learn as you go.
Keep it simple, enjoy the hobby, and happy worm farming!