
If you’re thinking about starting worm composting, you’ve probably noticed something real quick:
Everyone has an opinion, and half of them contradict each other.
Some people swear you must build your own worm bin.
Others say DIY is a waste of time and you should just buy one.
I’ve done both. And here’s the truth most guides won’t tell you:
There’s no “best” worm composting bin — only the best one for your situation.
This guide breaks it all down without hype, overcomplication, or pretending that one option magically works for everyone.
If you want worms that survive, compost that doesn’t stink, and a setup you won’t abandon in two months, you’re in the right place.
Quick Answer (For People Who Just Want the Verdict)
Here’s the short version before we go deep:
- DIY worm bins are cheaper upfront and great if you enjoy tinkering
- Store-bought worm bins cost more but save time, mess, and frustration
- Indoor composters almost always do better with store-bought systems
- Most people who start DIY eventually upgrade
Now let’s break down why.
What a Worm Composting Bin Actually Needs to Work
A worm bin only works if it consistently provides four things:
- Proper airflow
- Moisture balance (not soup, not desert)
- Drainage for excess liquid
- Easy access for feeding and harvesting

Every bin — DIY or store-bought — succeeds or fails based on how well it handles those basics.
That’s why some $20 DIY bins outperform expensive systems… and why some pricey bins end up abandoned in garages.
Types of Worm Composting Bins (Explained Simply)
Before choosing DIY or store-bought, you need to understand the three main bin styles.
Tote-Style Worm Bins
This is the classic DIY approach.
Usually a plastic storage tote with:
- drilled air holes
- drainage holes
- shredded bedding
- a catch tray or bricks underneath
Pros
- Cheapest option
- Easy to find materials
- Good learning experience
Cons
- Easy to overwater
- Harvesting castings is messy
- Smell issues if airflow is off
Best for:
Hands-on beginners who like DIY projects and don’t mind trial and error.
Stackable Worm Bin Systems
These are the most popular store-bought systems.
They use multiple trays that stack upward as worms migrate to fresh food.

Pros
- Cleaner harvesting
- Better airflow control
- Easier for indoor use
Cons
- Higher upfront cost
- Some models are cheaply made
Best for:
Busy households, indoor composters, and people who want consistency.
Continuous Flow Worm Bins
These are larger, often outdoor systems with a harvesting door at the bottom.
Pros
- High worm output
- Easy harvesting once established
- Great for serious composters
Cons
- Expensive
- Takes time to dial in
- Overkill for beginners
Best for:
Gardeners, homesteaders, or anyone producing lots of food scraps.
DIY Worm Composting Bin: What It Really Takes
When you account for the bin, necessary supplies, and a pound of healthy composting worms, a simple DIY worm bin typically costs between $55 and $100 for most beginners.
They’re cheap.
They’re not always easy.

What You Actually Need for a DIY Worm Bin
Here’s the realistic supply list:
DIY Worm Bin Supply Chart
Here’s what to buy for a simple DIY worm bin. I kept this list tight: the essentials, one optional “quality-of-life” upgrade, and the worm source I trust.

Opaque + durable = calmer worms and fewer beginner headaches.
You’ll use this for airflow holes (and it’s useful for a hundred other DIY jobs).

Multiple sizes lets you fine-tune airflow without overdoing it.

Moisture buffer + structure—helps prevent the “wet, smelly bin” problem.

Not required, but it makes bedding prep fast (especially cardboard).
Healthy worms = a bin that takes off fast. This is where you don’t cut corners.
Start Here (Don’t Overthink It)
If you’re starting today, these are the essentials. If you already own a drill, skip that line item and you’re golden.
Real DIY Costs (Most People Underestimate This)
People love saying, “I built mine for $20.”
That’s usually not the full story.
By the time you factor in:
- bedding
- replacement bins
- moisture fixes
- dead worm restocks
💰 Estimated Total Cost Range
| Item | Typical Cost |
|---|---|
| Plastic bin | $10–$30 |
| Supplies (bedding, mesh, drainage) | $5–$15 |
| Worms (1 lb red wigglers) | $40–$60 |
➡️ Total Estimated Cost: $55–$105
DIY bins often creep closer to store-bought pricing over time.
Not always — but often.
Common DIY Worm Bin Problems
These are the issues I see over and over:
- Too wet → bad smells and worm loss
- Poor airflow → anaerobic conditions
- Hard harvesting → people stop using it
- Inconsistent feeding → worms crash
DIY works best when you’re willing to observe and adjust.
If you want “set it and forget it,” this isn’t it.
Best Store-Bought Worm Composting Bins (By Use Case)
Best for Beginners
Look for:
- simple tray system
- sturdy plastic
- good ventilation
Avoid overly complex systems at first. I like the Vevor 5 Tray Worm Composter because it comes with everything you need except the worms.

Essential Living Worm Composter (2-Tray)
Simple trays, solid build, and great airflow — a forgiving “first real” worm bin.
- Easy tray system (cleaner harvest)
- Good ventilation helps prevent odor
- Durable plastic that holds up

5-Tray Worm Composter (50L)
More capacity without added complexity — start small, then scale as your worms multiply.
- Stackable trays = easy expansion
- Ventilated design for healthier bedding
- Great value for bigger households
Both of these bins strike the best balance between simplicity, durability, and airflow — exactly what beginners need to avoid common worm composting mistakes.
Best for Indoor Composting
Prioritize:
- tight-fitting lids
- carbon-rich bedding compatibility
- easy liquid drainage
Indoor bins fail fast when moisture isn’t managed. I love my Vermihut so much, I bought a second one. They literally come with peat moss and fabric to line the bottom tray to help with escape artist.

Indoor Composting Kit (Castings + Worm Tea)
A compact indoor setup with a snug lid and simple drainage — great for kitchens and small spaces.
- Tight-fitting lid helps prevent odors
- Easy liquid drainage to avoid “too-wet” bins
- Plays nicely with carbon-rich bedding
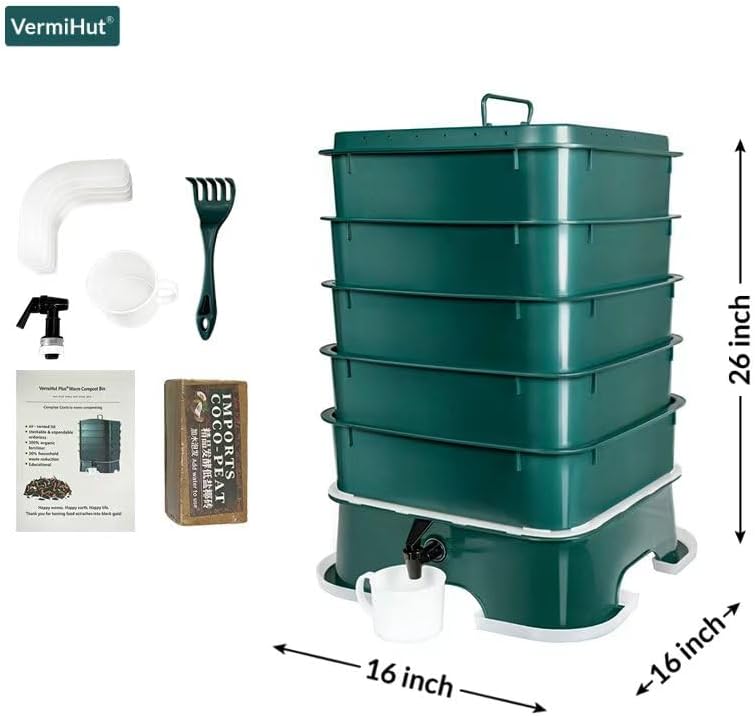
The Original VermiHut Plus (5-Tray)
Stackable trays + built-in drainage make moisture control easier — the #1 indoor success factor.
- Tray system keeps harvesting clean
- Ventilation supports healthy bedding
- Drainage helps prevent soggy odors
DIY vs Store-Bought Worm Bins: Side-by-Side Comparison
Here’s the honest comparison most people need:
| Feature | DIY Worm Bin | Store-Bought Bin |
|---|---|---|
| Upfront Cost | Low | Medium–High |
| Setup Time | Moderate | Minimal |
| Smell Control | Depends on skill | Much better |
| Harvesting Ease | Messy | Clean |
| Long-Term Use | Often upgraded | Stays usable |
| Indoor Friendly | Sometimes | Yes |
My Honest Recommendation (No Sugarcoating)
If I were starting from scratch today:
- Apartment or indoor setup? I’d buy a quality stackable bin. No question.
- Outdoor setup and enjoy DIY? Build a tote bin and learn the process.
- Serious gardening goals? Skip both and plan for a continuous flow bin.
Here’s the key thing most guides don’t say:
“The best worm bin is the one you’ll actually keep using.“
Perfect doesn’t matter. Consistency does.

Frequently Asked Questions
Do worm composting bins smell?
They shouldn’t.
If they do, it’s almost always:
- too much moisture
- too much food
- not enough airflow
Fix those and smell disappears fast.
Can I keep a worm bin indoors?
Yes — and many people do.
Indoor success depends heavily on:
- bin design
- bedding choice
- drainage
Store-bought bins have a clear advantage here.
How long before I get worm castings?
Usually 2–3 months for the first harvest.
DIY bins may take longer due to harvesting difficulty.
Is DIY worm composting worth it long-term?
For some people, absolutely.
For others, it becomes frustrating and abandoned.
That’s why many DIY composters eventually upgrade.
Final Thoughts: Choose Progress Over Perfection
Worm composting isn’t about building the “perfect” system.
It’s about:
- feeding worms regularly
- keeping moisture balanced
- staying consistent
Whether you build or buy, the goal is the same:
Healthy worms → rich castings → better soil.
If you want simplicity, go store-bought.
If you want control and learning, go DIY.
Either way, start now — not “someday.”
- How to Make & Use Worm Castings Tea (For Your Garden)
- 12 Powerful Ways to Use Worm Castings in Your Garden (Most Gardeners Only Use #1)
- 15 Best Plants for Container Gardening (Plus Their Perfect Companion Plants)
- Worm Castings vs Compost: Which Is Better for Your Garden?
- Let’s Make A Worm Farm For Your Garden: DIY Style


